Cross-Project Cloud SQL Migration Using Google Database Migration Service (DMS)
Migrating a Cloud SQL database from one Google Cloud project to another can be challenging—especially when you want minimal downtime and continuous replication (via Change Data Capture — CDC).
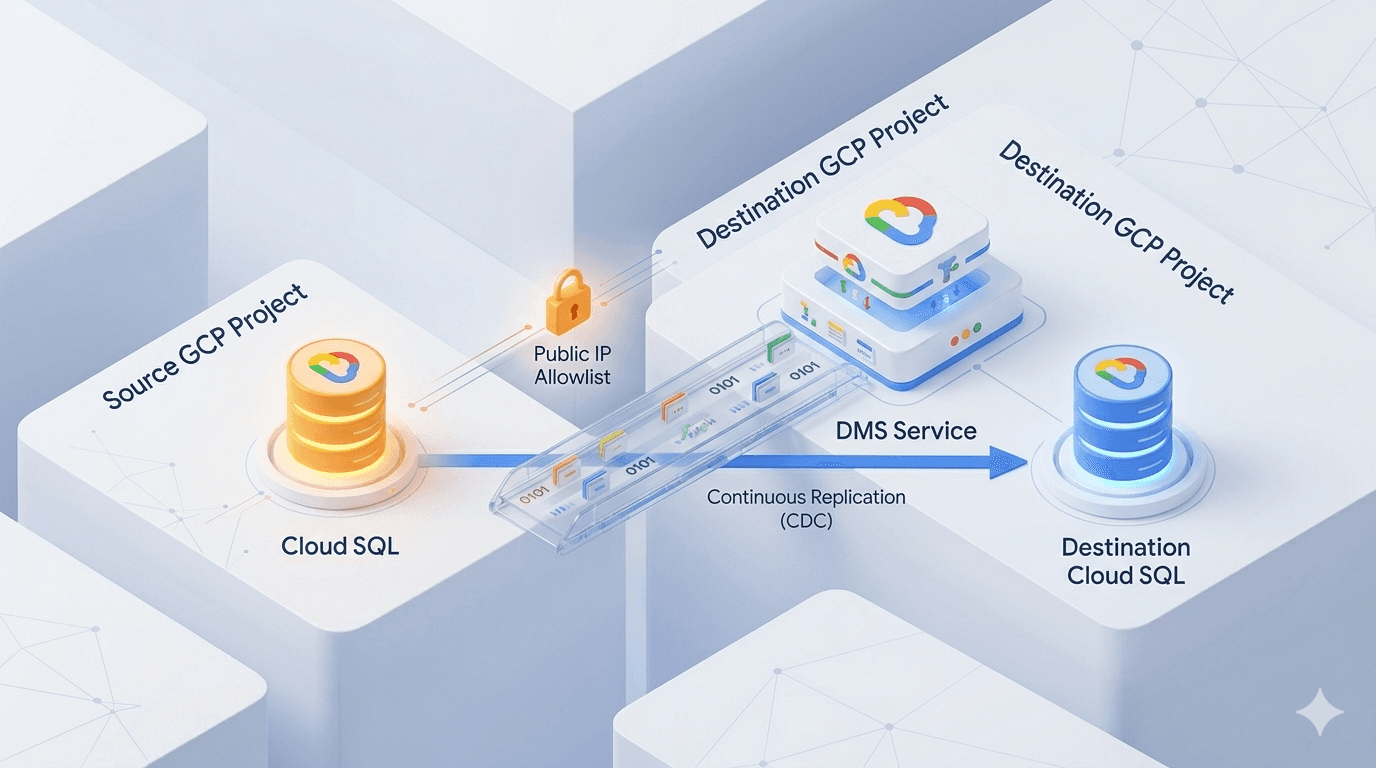
Google's Database Migration Service (DMS) makes this straightforward, even over public IP connectivity (ideal when VPC peering or Shared VPC isn't feasible).
In this guide, I walk you through a real-world cross-project migration of a Cloud SQL for MySQL instance using public IP allowlist connectivity — continuous mode — from source project → destination project.
This method helped me consolidate databases, refactor environments, and improve project isolation/security/governance.

High-level flow of DMS continuous migration with public IP connectivity
1. Introduction
Purpose
This post provides a detailed, production-tested step-by-step guide to migrate a Cloud SQL instance between GCP projects using DMS over public IP. It covers prerequisites, IAM roles, connectivity setup, job configuration, testing, cutover (promotion), and verification.
Target Audience
DevOps Engineers & SREs
Cloud Infrastructure / Database Administrators
GCP Architects performing project consolidations or refactoring
2. Overview
Database Migration Service (DMS) is a fully managed GCP service for zero/minimal-downtime migrations to Cloud SQL (MySQL, PostgreSQL) and AlloyDB.
Use cases for cross-project migration:
Consolidating scattered databases into a central project
Refactoring legacy/multi-project environments
Enforcing better security & governance through project boundaries
We use continuous migration (full load + CDC) over public IP allowlist connectivity.
Note: All DMS resources (connection profile, migration job, etc.) must reside in the same region as the destination Cloud SQL instance.
3. Prerequisites
Tools & Versions
| Tool / Technology | Requirement |
|---|---|
| Google Cloud Platform | Active billing in both projects |
| Cloud SQL | Same engine & version (e.g. MySQL 8.0.35+) |
| Database Migration Service | Enabled in the destination project |
Required IAM Roles
| Role | Project | Purpose |
|---|---|---|
Cloud SQL Admin (roles/cloudsql.admin) |
Both | Manage Cloud SQL instances |
Database Migration Admin (roles/datamigration.admin) |
Destination | Create & manage DMS jobs/profiles |
Compute Network Admin (roles/compute.networkAdmin) |
Destination | Manage authorized networks (allowlist) |
4. Step-by-Step Migration Guide
Step 1: Get the Public IP of the Source Cloud SQL Instance
Go to SQL > Instances in the source project
Open the instance → Overview tab
Copy the Public IP address

Step 2: Create a Connection Profile in the Destination Project
Navigate to Database Migration > Connection profiles > Create profile
Settings:
Profile role: Source
Database engine: MySQL (or PostgreSQL)
Connection profile name/ID: e.g.
source-db-profileHostname/IP: Paste source Cloud SQL public IP
Port: 3306 (MySQL) or 5432 (PostgreSQL)
Username/Password: Source DB credentials (e.g.
rootuser)Region: Must match destination Cloud SQL region
Save

Step 3: Create the Migration Job
Go to Database Migration > Migration jobs > Create
Fill basics:
Migration job name/ID: e.g.
cross-project-migSource database engine: MySQL
Destination region: (same as target instance)
Migration job type: Continuous (enables CDC / real-time sync)

Step 4: Define Source Configuration
Select the connection profile created in Step 2
Full dump configuration:
Dump method: Logical
Parallelism: Optimal or Max (for better performance)

Step 5: Define the Destination Cloud SQL Instance
Option A — Existing instance: Select it (must match engine/version)
Option B — New instance: Let DMS create it
Match source engine & version
Set root password
Choose adequate machine type & storage (under-provisioning slows migration!)
Important: This choice (existing vs new) is permanent.


Step 6: Configure IP Allowlist (Public Connectivity)
DMS requires bidirectional connectivity over public IP.
Destination instance:
Go to Cloud SQL > Connections
Enable Public IP if not already
Note the Outgoing IP from Overview tab (this is the IP DMS uses to connect to source)
Source instance:
Go to Cloud SQL > Connections > Authorized networks
Add the destination's outgoing IP (from step above) as an authorized network


Step 7: Test the Migration Job
In the migration job creation wizard → Test button
Wait for "Test run complete – successful"
If it fails: double-check credentials, public IPs, allowlist, firewall rules
Once passed → Create (you can start immediately or later)


Step 8: Start & Monitor the Job and Verify Data Consistency
Start the job
Monitor:
Replication delay / lag
Phase (Full catch-up → CDC)
Source :


Destination :


Step 9: Promote the Destination instance
After the verification of data consistency, Once the replication delay is least, proceed with promoting the destination Database to be a writeable instance.

Step 10: Check Migration Job Logs or Destination Instance Logs
If the logs for the migration job or the destination instance logs are required, they can be viewed by clicking on the view logs and selecting the logs which are required.

5. Troubleshooting
5.1 : Common Issues
| Issues | Possible Cause |
|---|---|
| Connection Test Fails | Public IP not whitelisted or wrong Credentials |
| Version Mismatch | Cloud SQL minor version mismatch |
| IAM Permission errors | Missing roles in source/destination |
| Cutover Fails | Replication lag or write operations on source. |
5.2 : Solutions
Re-check authorized network setting
Verify SQL Version via gcloud sql instance describe
Ensure IAM Roles and API's are correctly configured
6. Conclusion
This blog explained how to migrate a Cloud SQL instance across GCP Projects using DMS over public IP.
It covered :
API Setup
Source/Destination Configuration
DMS Connection profiles and job creation
Troubleshooting the issues